Raumschiffe des Rotharianischen Sternenverbundes: Unterschied zwischen den Versionen
Zur Navigation springen
Zur Suche springen
Amun (Diskussion | Beiträge) |
Amun (Diskussion | Beiträge) |
||
| Zeile 302: | Zeile 302: | ||
===Jäger/Fighter (Schiffstyp 4)=== | ===Jäger/Fighter (Schiffstyp 4)=== | ||
| − | + | {| cellspacing="0" style="border:2px solid #1ccf13;padding:1em;padding-top:0.5em;" | |
| − | + | ! width="140" bgcolor="#1ccf13" align="center" | Jäger: | |
| − | + | ! width="130" bgcolor="#1ccf13" align="center" | M'esothirax | |
| + | ! width="130" bgcolor="#1ccf13" align="center" | M'etathaurax | ||
| + | ! width="130" bgcolor="#1ccf13" align="center" | M'adomen | ||
| + | |- | ||
| + | | style="background-color:#D1DEEE;" align="center" | | ||
| + | | style="background-color:#000010;" align="center" | http://birth-of-the-empires.de/wiki_files/Bilder/Ships/Mesothirax.png | ||
| + | | style="background-color:#000010;" align="center" | http://birth-of-the-empires.de/wiki_files/Bilder/Ships/Metathaurax.png | ||
| + | | style="background-color:#000010;" align="center" | http://birth-of-the-empires.de/wiki_files/Bilder/Ships/Madomen.png | ||
| + | |- | ||
| + | | style="background-color:#D1DEEE;" align="center" | | ||
| + | | style="background-color:#D1DEEE;" align="center" | | ||
| + | | style="background-color:#D1DEEE;" align="center" | | ||
| + | | style="background-color:#D1DEEE;" align="center" | | ||
| + | |- | ||
| + | | style="background-color:#B4CDCD;" align="center" | Verfügbarkeit: | ||
| + | | style="background-color:#B4CDCD;" align="center" | Tech 1 | ||
| + | | style="background-color:#B4CDCD;" align="center" | Tech 4 & 5 | ||
| + | | style="background-color:#B4CDCD;" align="center" | Tech 7 & 8 | ||
| + | |- | ||
| + | | style="background-color:#D1DEEE;" align="center" | | ||
| + | | style="background-color:#D1DEEE;" align="center" | | ||
| + | | style="background-color:#D1DEEE;" align="center" | | ||
| + | | style="background-color:#D1DEEE;" align="center" | | ||
| + | |- | ||
| + | | style="background-color:#b2ffb0;" align="center" | Hüllenstärke(Basis): | ||
| + | | style="background-color:#b2ffb0;" align="center" | 350 | ||
| + | | style="background-color:#b2ffb0;" align="center" | 120 | ||
| + | | style="background-color:#b2ffb0;" align="center" | 280 | ||
| + | |- | ||
| + | | style="background-color:#b2ffb0;" align="center" | Schildstärke(Basis): | ||
| + | | style="background-color:#b2ffb0;" align="center" | 1.500 | ||
| + | | style="background-color:#b2ffb0;" align="center" | 1.400 | ||
| + | | style="background-color:#b2ffb0;" align="center" | 1.600 | ||
| + | |- | ||
| + | | style="background-color:#ffb0b0;" align="center" | Beam (Basis)/ max.: | ||
| + | | style="background-color:#ffb0b0;" align="center" | 864 | ||
| + | | style="background-color:#ffb0b0;" align="center" | 980 | ||
| + | | style="background-color:#ffb0b0;" align="center" | 1092 | ||
| + | |- | ||
| + | | style="background-color:#ffb0b0;" align="center" | Torpedo (Basis)/ max.: | ||
| + | | style="background-color:#ffb0b0;" align="center" | 150 | ||
| + | | style="background-color:#ffb0b0;" align="center" | 800 | ||
| + | | style="background-color:#ffb0b0;" align="center" | 3.750 | ||
| + | |- | ||
| + | | style="background-color:#D1DEEE;" align="center" | | ||
| + | | style="background-color:#D1DEEE;" align="center" | | ||
| + | | style="background-color:#D1DEEE;" align="center" | | ||
| + | | style="background-color:#D1DEEE;" align="center" | | ||
| + | |- | ||
| + | | style="background-color:#B4CDCD;" align="center" | Geschwindigkeit: | ||
| + | | style="background-color:#B4CDCD;" align="center" | 1 | ||
| + | | style="background-color:#B4CDCD;" align="center" | 2 | ||
| + | | style="background-color:#B4CDCD;" align="center" | 3 | ||
| + | |- | ||
| + | | style="background-color:#B4CDCD;" align="center" | Reichweite: | ||
| + | | style="background-color:#B4CDCD;" align="center" | mittel | ||
| + | | style="background-color:#B4CDCD;" align="center" | mittel | ||
| + | | style="background-color:#B4CDCD;" align="center" | mittel | ||
| + | |- | ||
| + | | style="background-color:#B4CDCD;" align="center" | Manövrierbarkeit: | ||
| + | | style="background-color:#B4CDCD;" align="center" | normal | ||
| + | | style="background-color:#B4CDCD;" align="center" | sehr gut | ||
| + | | style="background-color:#B4CDCD;" align="center" | sehr gut | ||
| + | |- | ||
| + | | style="background-color:#B4CDCD;" align="center" | Scanstärke: | ||
| + | | style="background-color:#B4CDCD;" align="center" | 40 | ||
| + | | style="background-color:#B4CDCD;" align="center" | 50 | ||
| + | | style="background-color:#B4CDCD;" align="center" | 40 | ||
| + | |- | ||
| + | | style="background-color:#B4CDCD;" align="center" | Tarnfähig: | ||
| + | | style="background-color:#B4CDCD;" align="center" | ja/ Level 4 | ||
| + | | style="background-color:#B4CDCD;" align="center" | ja/ Level 5 | ||
| + | | style="background-color:#B4CDCD;" align="center" | ja/ Level 5 | ||
| + | |- | ||
| + | | style="background-color:#D1DEEE;" align="center" | | ||
| + | | style="background-color:#D1DEEE;" align="center" | | ||
| + | | style="background-color:#D1DEEE;" align="center" | | ||
| + | | style="background-color:#D1DEEE;" align="center" | | ||
| + | |- | ||
| + | | style="background-color:#fff7b0;" align="center" | Unterhaltskosten: | ||
| + | | style="background-color:#fff7b0;" align="center" | 11 | ||
| + | | style="background-color:#fff7b0;" align="center" | 16 | ||
| + | | style="background-color:#fff7b0;" align="center" | 48 | ||
| + | |- | ||
| + | | style="background-color:#D1DEEE;" align="center" | | ||
| + | | style="background-color:#D1DEEE;" align="center" | | ||
| + | | style="background-color:#D1DEEE;" align="center" | | ||
| + | | style="background-color:#D1DEEE;" align="center" | | ||
| + | |- | ||
| + | | style="background-color:#B4CDCD;" align="center" | Spezialeigenschaft 1: | ||
| + | | style="background-color:#B4CDCD;" align="center" | Anti-Nahkampfschiff | ||
| + | | style="background-color:#B4CDCD;" align="center" | Nahkampfschiff | ||
| + | | style="background-color:#B4CDCD;" align="center" | Nahkampfschiff | ||
| + | |- | ||
| + | | style="background-color:#B4CDCD;" align="center" | Spezialeigenschaft 2: | ||
| + | | style="background-color:#B4CDCD;" align="center" | Anti-Nahkampfschiff | ||
| + | | style="background-color:#B4CDCD;" align="center" | Hüllenpolarisation | ||
| + | | style="background-color:#B4CDCD;" align="center" | regenerative Schilde | ||
| + | |} | ||
| + | |||
===Fregatte/Frigate (Schiffstyp 5)=== | ===Fregatte/Frigate (Schiffstyp 5)=== | ||
*Keine | *Keine | ||
| + | |||
===Zerstörer/Destroyer (Schiffstyp 6)=== | ===Zerstörer/Destroyer (Schiffstyp 6)=== | ||
| − | + | ||
| + | {| cellspacing="0" style="border:2px solid #1ccf13;padding:1em;padding-top:0.5em;" | ||
| + | ! width="140" bgcolor="#1ccf13" align="center" | Zerstörer: | ||
| + | ! width="130" bgcolor="#1ccf13" align="center" | V'emur | ||
| + | |- | ||
| + | | style="background-color:#D1DEEE;" align="center" | | ||
| + | | style="background-color:#000010;" align="center" | http://birth-of-the-empires.de/wiki_files/Bilder/Ships/Vemur.png | ||
| + | |- | ||
| + | | style="background-color:#D1DEEE;" align="center" | | ||
| + | | style="background-color:#D1DEEE;" align="center" | | ||
| + | |- | ||
| + | | style="background-color:#B4CDCD;" align="center" | Verfügbarkeit: | ||
| + | | style="background-color:#B4CDCD;" align="center" | Tech 2 & 3 | ||
| + | |- | ||
| + | | style="background-color:#D1DEEE;" align="center" | | ||
| + | | style="background-color:#D1DEEE;" align="center" | | ||
| + | |- | ||
| + | | style="background-color:#b2ffb0;" align="center" | Hüllenstärke(Basis): | ||
| + | | style="background-color:#b2ffb0;" align="center" | 320 | ||
| + | |- | ||
| + | | style="background-color:#b2ffb0;" align="center" | Schildstärke(Basis): | ||
| + | | style="background-color:#b2ffb0;" align="center" | 2.000 | ||
| + | |- | ||
| + | | style="background-color:#ffb0b0;" align="center" | Beam (Basis)/ max.: | ||
| + | | style="background-color:#ffb0b0;" align="center" | 1.188 | ||
| + | |- | ||
| + | | style="background-color:#ffb0b0;" align="center" | Torpedo (Basis)/ max.: | ||
| + | | style="background-color:#ffb0b0;" align="center" | 800 | ||
| + | |- | ||
| + | | style="background-color:#D1DEEE;" align="center" | | ||
| + | | style="background-color:#D1DEEE;" align="center" | | ||
| + | |- | ||
| + | | style="background-color:#B4CDCD;" align="center" | Geschwindigkeit: | ||
| + | | style="background-color:#B4CDCD;" align="center" | 2 | ||
| + | |- | ||
| + | | style="background-color:#B4CDCD;" align="center" | Reichweite: | ||
| + | | style="background-color:#B4CDCD;" align="center" | mittel | ||
| + | |- | ||
| + | | style="background-color:#B4CDCD;" align="center" | Manövrierbarkeit: | ||
| + | | style="background-color:#B4CDCD;" align="center" | normal | ||
| + | |- | ||
| + | | style="background-color:#B4CDCD;" align="center" | Scanstärke: | ||
| + | | style="background-color:#B4CDCD;" align="center" | 60 | ||
| + | |- | ||
| + | | style="background-color:#B4CDCD;" align="center" | Tarnfähig: | ||
| + | | style="background-color:#B4CDCD;" align="center" | ja/ Level 4 | ||
| + | |- | ||
| + | | style="background-color:#D1DEEE;" align="center" | | ||
| + | | style="background-color:#D1DEEE;" align="center" | | ||
| + | |- | ||
| + | | style="background-color:#fff7b0;" align="center" | Unterhaltskosten: | ||
| + | | style="background-color:#fff7b0;" align="center" | 21 | ||
| + | |- | ||
| + | | style="background-color:#D1DEEE;" align="center" | | ||
| + | | style="background-color:#D1DEEE;" align="center" | | ||
| + | | style="background-color:#D1DEEE;" align="center" | | ||
| + | | style="background-color:#D1DEEE;" align="center" | | ||
| + | |- | ||
| + | | style="background-color:#B4CDCD;" align="center" | Spezialeigenschaft 1: | ||
| + | | style="background-color:#B4CDCD;" align="center" | Patrouillienschiff | ||
| + | |- | ||
| + | | style="background-color:#B4CDCD;" align="center" | Spezialeigenschaft 2: | ||
| + | | style="background-color:#B4CDCD;" align="center" | Raider | ||
| + | |} | ||
| + | |||
===Kreuzer/Cruiser (Schiffstyp 7)=== | ===Kreuzer/Cruiser (Schiffstyp 7)=== | ||
| − | + | ||
| − | + | {| cellspacing="0" style="border:2px solid #1ccf13;padding:1em;padding-top:0.5em;" | |
| − | + | ! width="140" bgcolor="#1ccf13" align="center" | Jäger: | |
| + | ! width="130" bgcolor="#1ccf13" align="center" | R'Acron | ||
| + | ! width="130" bgcolor="#1ccf13" align="center" | V'epipharyn | ||
| + | ! width="130" bgcolor="#1ccf13" align="center" | V'Tarsomer | ||
| + | |- | ||
| + | | style="background-color:#D1DEEE;" align="center" | | ||
| + | | style="background-color:#000010;" align="center" | http://birth-of-the-empires.de/wiki_files/Bilder/Ships/RAcron.png | ||
| + | | style="background-color:#000010;" align="center" | http://birth-of-the-empires.de/wiki_files/Bilder/Ships/Vepipharyn.png | ||
| + | | style="background-color:#000010;" align="center" | http://birth-of-the-empires.de/wiki_files/Bilder/Ships/VTarsomer.png | ||
| + | |- | ||
| + | | style="background-color:#D1DEEE;" align="center" | | ||
| + | | style="background-color:#D1DEEE;" align="center" | | ||
| + | | style="background-color:#D1DEEE;" align="center" | | ||
| + | | style="background-color:#D1DEEE;" align="center" | | ||
| + | |- | ||
| + | | style="background-color:#B4CDCD;" align="center" | Verfügbarkeit: | ||
| + | | style="background-color:#B4CDCD;" align="center" | Tech 3 & 4 | ||
| + | | style="background-color:#B4CDCD;" align="center" | Tech 5 | ||
| + | | style="background-color:#B4CDCD;" align="center" | Tech 8 | ||
| + | |- | ||
| + | | style="background-color:#D1DEEE;" align="center" | | ||
| + | | style="background-color:#D1DEEE;" align="center" | | ||
| + | | style="background-color:#D1DEEE;" align="center" | | ||
| + | | style="background-color:#D1DEEE;" align="center" | | ||
| + | |- | ||
| + | | style="background-color:#b2ffb0;" align="center" | Hüllenstärke(Basis): | ||
| + | | style="background-color:#b2ffb0;" align="center" | 800 | ||
| + | | style="background-color:#b2ffb0;" align="center" | 720 | ||
| + | | style="background-color:#b2ffb0;" align="center" | 840 | ||
| + | |- | ||
| + | | style="background-color:#b2ffb0;" align="center" | Schildstärke(Basis): | ||
| + | | style="background-color:#b2ffb0;" align="center" | 2.600 | ||
| + | | style="background-color:#b2ffb0;" align="center" | 4.400 | ||
| + | | style="background-color:#b2ffb0;" align="center" | 4.200 | ||
| + | |- | ||
| + | | style="background-color:#ffb0b0;" align="center" | Beam (Basis)/ max.: | ||
| + | | style="background-color:#ffb0b0;" align="center" | 1.080 | ||
| + | | style="background-color:#ffb0b0;" align="center" | 2.450 | ||
| + | | style="background-color:#ffb0b0;" align="center" | 2.184 | ||
| + | |- | ||
| + | | style="background-color:#ffb0b0;" align="center" | Torpedo (Basis)/ max.: | ||
| + | | style="background-color:#ffb0b0;" align="center" | 1.200 | ||
| + | | style="background-color:#ffb0b0;" align="center" | 2.400 | ||
| + | | style="background-color:#ffb0b0;" align="center" | 7.500 | ||
| + | |- | ||
| + | | style="background-color:#D1DEEE;" align="center" | | ||
| + | | style="background-color:#D1DEEE;" align="center" | | ||
| + | | style="background-color:#D1DEEE;" align="center" | | ||
| + | | style="background-color:#D1DEEE;" align="center" | | ||
| + | |- | ||
| + | | style="background-color:#B4CDCD;" align="center" | Geschwindigkeit: | ||
| + | | style="background-color:#B4CDCD;" align="center" | 2 | ||
| + | | style="background-color:#B4CDCD;" align="center" | 3 | ||
| + | | style="background-color:#B4CDCD;" align="center" | 3 | ||
| + | |- | ||
| + | | style="background-color:#B4CDCD;" align="center" | Reichweite: | ||
| + | | style="background-color:#B4CDCD;" align="center" | kurz | ||
| + | | style="background-color:#B4CDCD;" align="center" | mittel | ||
| + | | style="background-color:#B4CDCD;" align="center" | mittel | ||
| + | |- | ||
| + | | style="background-color:#B4CDCD;" align="center" | Manövrierbarkeit: | ||
| + | | style="background-color:#B4CDCD;" align="center" | sehr schlecht | ||
| + | | style="background-color:#B4CDCD;" align="center" | sehr schlecht | ||
| + | | style="background-color:#B4CDCD;" align="center" | schlecht | ||
| + | |- | ||
| + | | style="background-color:#B4CDCD;" align="center" | Scanstärke: | ||
| + | | style="background-color:#B4CDCD;" align="center" | 50 | ||
| + | | style="background-color:#B4CDCD;" align="center" | 40 | ||
| + | | style="background-color:#B4CDCD;" align="center" | 60 | ||
| + | |- | ||
| + | | style="background-color:#B4CDCD;" align="center" | Tarnfähig: | ||
| + | | style="background-color:#B4CDCD;" align="center" | ja/ Level 4 | ||
| + | | style="background-color:#B4CDCD;" align="center" | ja/ Level 4 | ||
| + | | style="background-color:#B4CDCD;" align="center" | ja/ Level 6 | ||
| + | |- | ||
| + | | style="background-color:#D1DEEE;" align="center" | | ||
| + | | style="background-color:#D1DEEE;" align="center" | | ||
| + | | style="background-color:#D1DEEE;" align="center" | | ||
| + | | style="background-color:#D1DEEE;" align="center" | | ||
| + | |- | ||
| + | | style="background-color:#fff7b0;" align="center" | Unterhaltskosten: | ||
| + | | style="background-color:#fff7b0;" align="center" | 38 | ||
| + | | style="background-color:#fff7b0;" align="center" | 71 | ||
| + | | style="background-color:#fff7b0;" align="center" | 179 | ||
| + | |- | ||
| + | | style="background-color:#D1DEEE;" align="center" | | ||
| + | | style="background-color:#D1DEEE;" align="center" | | ||
| + | | style="background-color:#D1DEEE;" align="center" | | ||
| + | | style="background-color:#D1DEEE;" align="center" | | ||
| + | |- | ||
| + | | style="background-color:#B4CDCD;" align="center" | Spezialeigenschaft 1: | ||
| + | | style="background-color:#B4CDCD;" align="center" | Assaultschiff | ||
| + | | style="background-color:#B4CDCD;" align="center" | Kommandoschiff | ||
| + | | style="background-color:#B4CDCD;" align="center" | Anti-Nahkampfschiff | ||
| + | |- | ||
| + | | style="background-color:#B4CDCD;" align="center" | Spezialeigenschaft 2: | ||
| + | | style="background-color:#B4CDCD;" align="center" | | ||
| + | | style="background-color:#B4CDCD;" align="center" | | ||
| + | | style="background-color:#B4CDCD;" align="center" | regenerative Schilde | ||
| + | |} | ||
| + | |||
===Schwerer Zerstörer/Heavy Destroyer (Schiffstyp 8)=== | ===Schwerer Zerstörer/Heavy Destroyer (Schiffstyp 8)=== | ||
| − | + | ||
| + | {| cellspacing="0" style="border:2px solid #1ccf13;padding:1em;padding-top:0.5em;" | ||
| + | ! width="140" bgcolor="#1ccf13" align="center" | Schwerer Zerstörer: | ||
| + | ! width="130" bgcolor="#1ccf13" align="center" | V'tarsus | ||
| + | |- | ||
| + | | style="background-color:#D1DEEE;" align="center" | | ||
| + | | style="background-color:#000010;" align="center" | http://birth-of-the-empires.de/wiki_files/Bilder/Ships/Vtarsus.png | ||
| + | |- | ||
| + | | style="background-color:#D1DEEE;" align="center" | | ||
| + | | style="background-color:#D1DEEE;" align="center" | | ||
| + | |- | ||
| + | | style="background-color:#B4CDCD;" align="center" | Verfügbarkeit: | ||
| + | | style="background-color:#B4CDCD;" align="center" | Tech 9 | ||
| + | |- | ||
| + | | style="background-color:#D1DEEE;" align="center" | | ||
| + | | style="background-color:#D1DEEE;" align="center" | | ||
| + | |- | ||
| + | | style="background-color:#b2ffb0;" align="center" | Hüllenstärke(Basis): | ||
| + | | style="background-color:#b2ffb0;" align="center" | 460 | ||
| + | |- | ||
| + | | style="background-color:#b2ffb0;" align="center" | Schildstärke(Basis): | ||
| + | | style="background-color:#b2ffb0;" align="center" | 3.000 | ||
| + | |- | ||
| + | | style="background-color:#ffb0b0;" align="center" | Beam (Basis)/ max.: | ||
| + | | style="background-color:#ffb0b0;" align="center" | 1.638 | ||
| + | |- | ||
| + | | style="background-color:#ffb0b0;" align="center" | Torpedo (Basis)/ max.: | ||
| + | | style="background-color:#ffb0b0;" align="center" | 5.000 | ||
| + | |- | ||
| + | | style="background-color:#D1DEEE;" align="center" | | ||
| + | | style="background-color:#D1DEEE;" align="center" | | ||
| + | |- | ||
| + | | style="background-color:#B4CDCD;" align="center" | Geschwindigkeit: | ||
| + | | style="background-color:#B4CDCD;" align="center" | 4 | ||
| + | |- | ||
| + | | style="background-color:#B4CDCD;" align="center" | Reichweite: | ||
| + | | style="background-color:#B4CDCD;" align="center" | mittel | ||
| + | |- | ||
| + | | style="background-color:#B4CDCD;" align="center" | Manövrierbarkeit: | ||
| + | | style="background-color:#B4CDCD;" align="center" | ausreichend | ||
| + | |- | ||
| + | | style="background-color:#B4CDCD;" align="center" | Scanstärke: | ||
| + | | style="background-color:#B4CDCD;" align="center" | 70 | ||
| + | |- | ||
| + | | style="background-color:#B4CDCD;" align="center" | Tarnfähig: | ||
| + | | style="background-color:#B4CDCD;" align="center" | ja/ Level 6 | ||
| + | |- | ||
| + | | style="background-color:#D1DEEE;" align="center" | | ||
| + | | style="background-color:#D1DEEE;" align="center" | | ||
| + | |- | ||
| + | | style="background-color:#fff7b0;" align="center" | Unterhaltskosten: | ||
| + | | style="background-color:#fff7b0;" align="center" | 125 | ||
| + | |- | ||
| + | | style="background-color:#D1DEEE;" align="center" | | ||
| + | | style="background-color:#D1DEEE;" align="center" | | ||
| + | |- | ||
| + | | style="background-color:#B4CDCD;" align="center" | Spezialeigenschaft 1: | ||
| + | | style="background-color:#B4CDCD;" align="center" | Patrouillienschiff | ||
| + | |- | ||
| + | | style="background-color:#B4CDCD;" align="center" | Spezialeigenschaft 2: | ||
| + | | style="background-color:#B4CDCD;" align="center" | Raider | ||
| + | |- | ||
| + | | style="background-color:#B4CDCD;" align="center" | Spezialeigenschaft 3: | ||
| + | | style="background-color:#B4CDCD;" align="center" | regenerative Schilde | ||
| + | |} | ||
| + | |||
===Schwerer Kreuzer/Heavy Cruiser (Schiffstyp 9)=== | ===Schwerer Kreuzer/Heavy Cruiser (Schiffstyp 9)=== | ||
| − | + | ||
| + | {| cellspacing="0" style="border:2px solid #1ccf13;padding:1em;padding-top:0.5em;" | ||
| + | ! width="140" bgcolor="#1ccf13" align="center" | Schwerer Kreuzer: | ||
| + | ! width="130" bgcolor="#1ccf13" align="center" | R'Tibia | ||
| + | |- | ||
| + | | style="background-color:#D1DEEE;" align="center" | | ||
| + | | style="background-color:#000010;" align="center" | http://birth-of-the-empires.de/wiki_files/Bilder/Ships/RTibia.png | ||
| + | |- | ||
| + | | style="background-color:#D1DEEE;" align="center" | | ||
| + | | style="background-color:#D1DEEE;" align="center" | | ||
| + | |- | ||
| + | | style="background-color:#B4CDCD;" align="center" | Verfügbarkeit: | ||
| + | | style="background-color:#B4CDCD;" align="center" | Tech 6 | ||
| + | |- | ||
| + | | style="background-color:#D1DEEE;" align="center" | | ||
| + | | style="background-color:#D1DEEE;" align="center" | | ||
| + | |- | ||
| + | | style="background-color:#b2ffb0;" align="center" | Hüllenstärke(Basis): | ||
| + | | style="background-color:#b2ffb0;" align="center" | 1.400 | ||
| + | |- | ||
| + | | style="background-color:#b2ffb0;" align="center" | Schildstärke(Basis): | ||
| + | | style="background-color:#b2ffb0;" align="center" | 5.000 | ||
| + | |- | ||
| + | | style="background-color:#ffb0b0;" align="center" | Beam (Basis)/ max.: | ||
| + | | style="background-color:#ffb0b0;" align="center" | 2.940 | ||
| + | |- | ||
| + | | style="background-color:#ffb0b0;" align="center" | Torpedo (Basis)/ max.: | ||
| + | | style="background-color:#ffb0b0;" align="center" | 3.600 | ||
| + | |- | ||
| + | | style="background-color:#D1DEEE;" align="center" | | ||
| + | | style="background-color:#D1DEEE;" align="center" | | ||
| + | |- | ||
| + | | style="background-color:#B4CDCD;" align="center" | Geschwindigkeit: | ||
| + | | style="background-color:#B4CDCD;" align="center" | 2 | ||
| + | |- | ||
| + | | style="background-color:#B4CDCD;" align="center" | Reichweite: | ||
| + | | style="background-color:#B4CDCD;" align="center" | mittel | ||
| + | |- | ||
| + | | style="background-color:#B4CDCD;" align="center" | Manövrierbarkeit: | ||
| + | | style="background-color:#B4CDCD;" align="center" | sehr schlecht | ||
| + | |- | ||
| + | | style="background-color:#B4CDCD;" align="center" | Scanstärke: | ||
| + | | style="background-color:#B4CDCD;" align="center" | 40 | ||
| + | |- | ||
| + | | style="background-color:#B4CDCD;" align="center" | Tarnfähig: | ||
| + | | style="background-color:#B4CDCD;" align="center" | ja/ Level | ||
| + | |- | ||
| + | | style="background-color:#D1DEEE;" align="center" | | ||
| + | | style="background-color:#D1DEEE;" align="center" | | ||
| + | |- | ||
| + | | style="background-color:#fff7b0;" align="center" | Unterhaltskosten: | ||
| + | | style="background-color:#fff7b0;" align="center" | 113 | ||
| + | |- | ||
| + | | style="background-color:#D1DEEE;" align="center" | | ||
| + | | style="background-color:#D1DEEE;" align="center" | | ||
| + | |- | ||
| + | | style="background-color:#B4CDCD;" align="center" | Spezialeigenschaft 1: | ||
| + | | style="background-color:#B4CDCD;" align="center" | Assaultschiff | ||
| + | |- | ||
| + | | style="background-color:#B4CDCD;" align="center" | Spezialeigenschaft 2: | ||
| + | | style="background-color:#B4CDCD;" align="center" | regenerative Schilde | ||
| + | |} | ||
| + | |||
===Kampfschiffe/Battleships (Schiffstyp 10)=== | ===Kampfschiffe/Battleships (Schiffstyp 10)=== | ||
| − | + | ||
| + | {| cellspacing="0" style="border:2px solid #1ccf13;padding:1em;padding-top:0.5em;" | ||
| + | ! width="140" bgcolor="#1ccf13" align="center" | Kampfschiff: | ||
| + | ! width="130" bgcolor="#1ccf13" align="center" | D'Ocellus | ||
| + | |- | ||
| + | | style="background-color:#D1DEEE;" align="center" | | ||
| + | | style="background-color:#000010;" align="center" | http://birth-of-the-empires.de/wiki_files/Bilder/Ships/DOcellus.png | ||
| + | |- | ||
| + | | style="background-color:#D1DEEE;" align="center" | | ||
| + | | style="background-color:#D1DEEE;" align="center" | | ||
| + | |- | ||
| + | | style="background-color:#B4CDCD;" align="center" | Verfügbarkeit: | ||
| + | | style="background-color:#B4CDCD;" align="center" | Tech 6 & 7 | ||
| + | |- | ||
| + | | style="background-color:#D1DEEE;" align="center" | | ||
| + | | style="background-color:#D1DEEE;" align="center" | | ||
| + | |- | ||
| + | | style="background-color:#b2ffb0;" align="center" | Hüllenstärke(Basis): | ||
| + | | style="background-color:#b2ffb0;" align="center" | 1.200 | ||
| + | |- | ||
| + | | style="background-color:#b2ffb0;" align="center" | Schildstärke(Basis): | ||
| + | | style="background-color:#b2ffb0;" align="center" | 6.000 | ||
| + | |- | ||
| + | | style="background-color:#ffb0b0;" align="center" | Beam (Basis)/ max.: | ||
| + | | style="background-color:#ffb0b0;" align="center" | 1.790 | ||
| + | |- | ||
| + | | style="background-color:#ffb0b0;" align="center" | Torpedo (Basis)/ max.: | ||
| + | | style="background-color:#ffb0b0;" align="center" | 7.500 | ||
| + | |- | ||
| + | | style="background-color:#D1DEEE;" align="center" | | ||
| + | | style="background-color:#D1DEEE;" align="center" | | ||
| + | |- | ||
| + | | style="background-color:#B4CDCD;" align="center" | Geschwindigkeit: | ||
| + | | style="background-color:#B4CDCD;" align="center" | 2 | ||
| + | |- | ||
| + | | style="background-color:#B4CDCD;" align="center" | Reichweite: | ||
| + | | style="background-color:#B4CDCD;" align="center" | mittel | ||
| + | |- | ||
| + | | style="background-color:#B4CDCD;" align="center" | Manövrierbarkeit: | ||
| + | | style="background-color:#B4CDCD;" align="center" | miserabel | ||
| + | |- | ||
| + | | style="background-color:#B4CDCD;" align="center" | Scanstärke: | ||
| + | | style="background-color:#B4CDCD;" align="center" | 70 | ||
| + | |- | ||
| + | | style="background-color:#B4CDCD;" align="center" | Tarnfähig: | ||
| + | | style="background-color:#B4CDCD;" align="center" | ja/ Level 5 | ||
| + | |- | ||
| + | | style="background-color:#D1DEEE;" align="center" | | ||
| + | | style="background-color:#D1DEEE;" align="center" | | ||
| + | |- | ||
| + | | style="background-color:#fff7b0;" align="center" | Unterhaltskosten: | ||
| + | | style="background-color:#fff7b0;" align="center" | 133 | ||
| + | |- | ||
| + | | style="background-color:#D1DEEE;" align="center" | | ||
| + | | style="background-color:#D1DEEE;" align="center" | | ||
| + | |- | ||
| + | | style="background-color:#B4CDCD;" align="center" | Spezialeigenschaft 1: | ||
| + | | style="background-color:#B4CDCD;" align="center" | Assaultschiff | ||
| + | |- | ||
| + | | style="background-color:#B4CDCD;" align="center" | Spezialeigenschaft 2: | ||
| + | | style="background-color:#B4CDCD;" align="center" | Kommandoschiff | ||
| + | |- | ||
| + | | style="background-color:#B4CDCD;" align="center" | Spezialeigenschaft 3: | ||
| + | | style="background-color:#B4CDCD;" align="center" | regenerative Schilde | ||
| + | |} | ||
| + | |||
===Schlachtschiff/Flagschip (Schiffstyp 11)=== | ===Schlachtschiff/Flagschip (Schiffstyp 11)=== | ||
| − | + | ||
| + | {| cellspacing="0" style="border:2px solid #1ccf13;padding:1em;padding-top:0.5em;" | ||
| + | ! width="140" bgcolor="#1ccf13" align="center" | Schlachtschiff: | ||
| + | ! width="130" bgcolor="#1ccf13" align="center" | D'Corax | ||
| + | |- | ||
| + | | style="background-color:#D1DEEE;" align="center" | | ||
| + | | style="background-color:#000010;" align="center" | http://birth-of-the-empires.de/wiki_files/Bilder/Ships/DCorax.png | ||
| + | |- | ||
| + | | style="background-color:#D1DEEE;" align="center" | | ||
| + | | style="background-color:#D1DEEE;" align="center" | | ||
| + | |- | ||
| + | | style="background-color:#B4CDCD;" align="center" | Verfügbarkeit: | ||
| + | | style="background-color:#B4CDCD;" align="center" | Tech 10 | ||
| + | |- | ||
| + | | style="background-color:#D1DEEE;" align="center" | | ||
| + | | style="background-color:#D1DEEE;" align="center" | | ||
| + | |- | ||
| + | | style="background-color:#b2ffb0;" align="center" | Hüllenstärke(Basis): | ||
| + | | style="background-color:#b2ffb0;" align="center" | 2.000 | ||
| + | |- | ||
| + | | style="background-color:#b2ffb0;" align="center" | Schildstärke(Basis): | ||
| + | | style="background-color:#b2ffb0;" align="center" | 8.000 | ||
| + | |- | ||
| + | | style="background-color:#ffb0b0;" align="center" | Beam (Basis)/ max.: | ||
| + | | style="background-color:#ffb0b0;" align="center" | 6.260 | ||
| + | |- | ||
| + | | style="background-color:#ffb0b0;" align="center" | Torpedo (Basis)/ max.: | ||
| + | | style="background-color:#ffb0b0;" align="center" | 20.000 | ||
| + | |- | ||
| + | | style="background-color:#D1DEEE;" align="center" | | ||
| + | | style="background-color:#D1DEEE;" align="center" | | ||
| + | |- | ||
| + | | style="background-color:#B4CDCD;" align="center" | Geschwindigkeit: | ||
| + | | style="background-color:#B4CDCD;" align="center" | 3 | ||
| + | |- | ||
| + | | style="background-color:#B4CDCD;" align="center" | Reichweite: | ||
| + | | style="background-color:#B4CDCD;" align="center" | mittel | ||
| + | |- | ||
| + | | style="background-color:#B4CDCD;" align="center" | Manövrierbarkeit: | ||
| + | | style="background-color:#B4CDCD;" align="center" | miserabel | ||
| + | |- | ||
| + | | style="background-color:#B4CDCD;" align="center" | Scanstärke: | ||
| + | | style="background-color:#B4CDCD;" align="center" | 82 | ||
| + | |- | ||
| + | | style="background-color:#B4CDCD;" align="center" | Tarnfähig: | ||
| + | | style="background-color:#B4CDCD;" align="center" | ja/ Level 6 | ||
| + | |- | ||
| + | | style="background-color:#D1DEEE;" align="center" | | ||
| + | | style="background-color:#D1DEEE;" align="center" | | ||
| + | |- | ||
| + | | style="background-color:#fff7b0;" align="center" | Unterhaltskosten: | ||
| + | | style="background-color:#fff7b0;" align="center" | 256 | ||
| + | |- | ||
| + | | style="background-color:#D1DEEE;" align="center" | | ||
| + | | style="background-color:#D1DEEE;" align="center" | | ||
| + | |- | ||
| + | | style="background-color:#B4CDCD;" align="center" | Spezialeigenschaft 1: | ||
| + | | style="background-color:#B4CDCD;" align="center" | Assaultschiff | ||
| + | |- | ||
| + | | style="background-color:#B4CDCD;" align="center" | Spezialeigenschaft 2: | ||
| + | | style="background-color:#B4CDCD;" align="center" | Kommandoschiff | ||
| + | |- | ||
| + | | style="background-color:#B4CDCD;" align="center" | Spezialeigenschaft 3: | ||
| + | | style="background-color:#B4CDCD;" align="center" | regenerative Schilde | ||
| + | |} | ||
| + | |||
===Aussenposten/Outposts (Schiffstyp 12)=== | ===Aussenposten/Outposts (Schiffstyp 12)=== | ||
Version vom 30. November 2011, 11:41 Uhr
Transportschiffe/Transport Ship (Schiffstyp 0)
| Transporter: | S'capus | S'altatoria | S'vistraea |
|---|---|---|---|
|
|

| |
| Verfügbarkeit: | Tech 0 | Tech 5 | Tech 5 & 6 |
| Hüllenstärke(Basis): | 300 | 800 | 600 |
| Schildstärke(Basis): | 600 | 2.500 | 1.500 |
| Beam (Basis)/ max.: | - | - | - |
| Torpedo (Basis)/ max.: | - | - | - |
| Geschwindigkeit: | 1 | 2 | 2 |
| Reichweite: | mittel | mittel | kurz |
| Manövrierbarkeit: | miserabel | sehr schlecht | miserabel |
| Scanstärke: | 0 | 0 | 0 |
| Tarnfähig: | nein | ja/ Level 4 | nein |
| Lagerkapazität: | 5.000 | 10.000 | 15.000 |
| Unterhaltskosten: | 14 | 32 | 21 |
| Spezialeigenschaft 1: | regenerative Schilde |
Kolonieschiffe/Colony Ship (Schiffstyp 1)
| Kolonieschiff: | C'lypeus | C'labrum | C'nutrix |
|---|---|---|---|
|
|

| |
| Verfügbarkeit: | Tech 0 | Tech 4 & 5 | Tech 4,5 & 6 |
| Hüllenstärke(Basis): | 200 | 500 | 300 |
| Schildstärke(Basis): | 900 | 1.500 | 1.000 |
| Beam (Basis)/ max.: | - | - | - |
| Torpedo (Basis)/ max.: | - | - | - |
| Geschwindigkeit: | 1 | 2 | 2 |
| Reichweite: | mittel | mittel | kurz |
| Manövrierbarkeit: | miserabel | sehr schlecht | miserabel |
| Scanstärke: | 0 | 0 | 0 |
| Tarnfähig: | nein | ja/ Level 4 | nein |
| Unterhaltskosten: | 5 | 18 | 13 |
Sonden/Probe (Schiffstyp 2)
- Keine
Aufklärer/Scout (Schiffstyp 3)
| Aufklärer: | P'ratarsus | P'rotharax | P'socodea |
|---|---|---|---|

|

|

| |
| Verfügbarkeit: | Tech 0 | Tech 5 & 6 | Tech 8 & 9 |
| Hüllenstärke(Basis): | 120 | 180 | 200 |
| Schildstärke(Basis): | 400 | 1.000 | 1.800 |
| Beam (Basis)/ max.: | 360 | 735 | 819 |
| Torpedo (Basis)/ max.: | 150 | 800 | 3.750 |
| Geschwindigkeit: | 1 | 2 | 4 |
| Reichweite: | lang | lang | lang |
| Manövrierbarkeit: | gut | gut | gut |
| Scanstärke: | 50 | 70 | 60 |
| Tarnfähig: | ja/ Level 4 | ja/ Level 5 | ja/ Level 6 |
| Unterhaltskosten: | 8 | 29 | 70 |
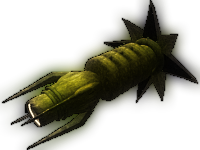
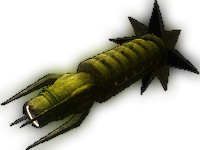
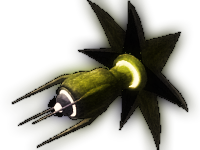
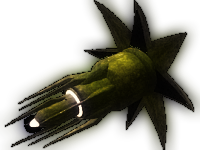
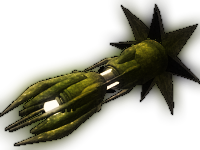
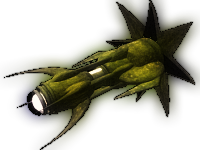
Jäger/Fighter (Schiffstyp 4)
| Jäger: | M'esothirax | M'etathaurax | M'adomen |
|---|---|---|---|

|

|

| |
| Verfügbarkeit: | Tech 1 | Tech 4 & 5 | Tech 7 & 8 |
| Hüllenstärke(Basis): | 350 | 120 | 280 |
| Schildstärke(Basis): | 1.500 | 1.400 | 1.600 |
| Beam (Basis)/ max.: | 864 | 980 | 1092 |
| Torpedo (Basis)/ max.: | 150 | 800 | 3.750 |
| Geschwindigkeit: | 1 | 2 | 3 |
| Reichweite: | mittel | mittel | mittel |
| Manövrierbarkeit: | normal | sehr gut | sehr gut |
| Scanstärke: | 40 | 50 | 40 |
| Tarnfähig: | ja/ Level 4 | ja/ Level 5 | ja/ Level 5 |
| Unterhaltskosten: | 11 | 16 | 48 |
| Spezialeigenschaft 1: | Anti-Nahkampfschiff | Nahkampfschiff | Nahkampfschiff |
| Spezialeigenschaft 2: | Anti-Nahkampfschiff | Hüllenpolarisation | regenerative Schilde |
Fregatte/Frigate (Schiffstyp 5)
- Keine
Zerstörer/Destroyer (Schiffstyp 6)
| Zerstörer: | V'emur | ||
|---|---|---|---|
| |||
| Verfügbarkeit: | Tech 2 & 3 | ||
| Hüllenstärke(Basis): | 320 | ||
| Schildstärke(Basis): | 2.000 | ||
| Beam (Basis)/ max.: | 1.188 | ||
| Torpedo (Basis)/ max.: | 800 | ||
| Geschwindigkeit: | 2 | ||
| Reichweite: | mittel | ||
| Manövrierbarkeit: | normal | ||
| Scanstärke: | 60 | ||
| Tarnfähig: | ja/ Level 4 | ||
| Unterhaltskosten: | 21 | ||
| Spezialeigenschaft 1: | Patrouillienschiff | ||
| Spezialeigenschaft 2: | Raider |
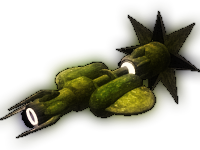
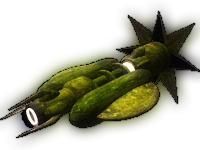
Kreuzer/Cruiser (Schiffstyp 7)
| Jäger: | R'Acron | V'epipharyn | V'Tarsomer |
|---|---|---|---|
|

|

| |
| Verfügbarkeit: | Tech 3 & 4 | Tech 5 | Tech 8 |
| Hüllenstärke(Basis): | 800 | 720 | 840 |
| Schildstärke(Basis): | 2.600 | 4.400 | 4.200 |
| Beam (Basis)/ max.: | 1.080 | 2.450 | 2.184 |
| Torpedo (Basis)/ max.: | 1.200 | 2.400 | 7.500 |
| Geschwindigkeit: | 2 | 3 | 3 |
| Reichweite: | kurz | mittel | mittel |
| Manövrierbarkeit: | sehr schlecht | sehr schlecht | schlecht |
| Scanstärke: | 50 | 40 | 60 |
| Tarnfähig: | ja/ Level 4 | ja/ Level 4 | ja/ Level 6 |
| Unterhaltskosten: | 38 | 71 | 179 |
| Spezialeigenschaft 1: | Assaultschiff | Kommandoschiff | Anti-Nahkampfschiff |
| Spezialeigenschaft 2: | regenerative Schilde |
Schwerer Zerstörer/Heavy Destroyer (Schiffstyp 8)
| Schwerer Zerstörer: | V'tarsus |
|---|---|
| |
| Verfügbarkeit: | Tech 9 |
| Hüllenstärke(Basis): | 460 |
| Schildstärke(Basis): | 3.000 |
| Beam (Basis)/ max.: | 1.638 |
| Torpedo (Basis)/ max.: | 5.000 |
| Geschwindigkeit: | 4 |
| Reichweite: | mittel |
| Manövrierbarkeit: | ausreichend |
| Scanstärke: | 70 |
| Tarnfähig: | ja/ Level 6 |
| Unterhaltskosten: | 125 |
| Spezialeigenschaft 1: | Patrouillienschiff |
| Spezialeigenschaft 2: | Raider |
| Spezialeigenschaft 3: | regenerative Schilde |
Schwerer Kreuzer/Heavy Cruiser (Schiffstyp 9)
| Schwerer Kreuzer: | R'Tibia |
|---|---|
| |
| Verfügbarkeit: | Tech 6 |
| Hüllenstärke(Basis): | 1.400 |
| Schildstärke(Basis): | 5.000 |
| Beam (Basis)/ max.: | 2.940 |
| Torpedo (Basis)/ max.: | 3.600 |
| Geschwindigkeit: | 2 |
| Reichweite: | mittel |
| Manövrierbarkeit: | sehr schlecht |
| Scanstärke: | 40 |
| Tarnfähig: | ja/ Level |
| Unterhaltskosten: | 113 |
| Spezialeigenschaft 1: | Assaultschiff |
| Spezialeigenschaft 2: | regenerative Schilde |
Kampfschiffe/Battleships (Schiffstyp 10)
| Kampfschiff: | D'Ocellus |
|---|---|

| |
| Verfügbarkeit: | Tech 6 & 7 |
| Hüllenstärke(Basis): | 1.200 |
| Schildstärke(Basis): | 6.000 |
| Beam (Basis)/ max.: | 1.790 |
| Torpedo (Basis)/ max.: | 7.500 |
| Geschwindigkeit: | 2 |
| Reichweite: | mittel |
| Manövrierbarkeit: | miserabel |
| Scanstärke: | 70 |
| Tarnfähig: | ja/ Level 5 |
| Unterhaltskosten: | 133 |
| Spezialeigenschaft 1: | Assaultschiff |
| Spezialeigenschaft 2: | Kommandoschiff |
| Spezialeigenschaft 3: | regenerative Schilde |
Schlachtschiff/Flagschip (Schiffstyp 11)
| Schlachtschiff: | D'Corax |
|---|---|
| |
| Verfügbarkeit: | Tech 10 |
| Hüllenstärke(Basis): | 2.000 |
| Schildstärke(Basis): | 8.000 |
| Beam (Basis)/ max.: | 6.260 |
| Torpedo (Basis)/ max.: | 20.000 |
| Geschwindigkeit: | 3 |
| Reichweite: | mittel |
| Manövrierbarkeit: | miserabel |
| Scanstärke: | 82 |
| Tarnfähig: | ja/ Level 6 |
| Unterhaltskosten: | 256 |
| Spezialeigenschaft 1: | Assaultschiff |
| Spezialeigenschaft 2: | Kommandoschiff |
| Spezialeigenschaft 3: | regenerative Schilde |
Aussenposten/Outposts (Schiffstyp 12)
- Asteroidenbasis
- Sektorstation
Sternbasen/Starbases (Schiffstyp 13)
- Orbitalbasis
- Orbitalstation
- Sternenbasis